At one point or another, anyone who wants to edit video has sat down at their computer and realised that it’s going to take the next few hours to look through all their footage and categorise it before they then get to spend another few hours playing with it and adding music before they finally get to export what they thought was a “rad edit” only to realise that it isn’t and that they left the best clip of the day on the SD card – I’ve been there and done that. This blog post will explain my method of quickly sorting through raw video and identifying which clips are worth using and what to use them for; I will be using an Apple Mac during my example but I’m sure there is an equivalent feature on Windows…

First things first – download all of your raw video into a named folder on the desktop. By moving the footage onto the computer you will remove any glitchy aspects (like jerkiness or low resolution) because the computer will be able to work directly with it on it’s own memory rather than having to use an SD (or MicroSD) card as an intermediary. Labelling is probably the most important step so putting these files in a named folder makes your life easier, so just do it.
A quick tip when it comes to playing back raw footage. You don’t want to watch it in real time because that will take far too long, instead drag the slider along the timeline to play the video speeded up. Remember not to go too fast otherwise you might miss something but it helps if you actually remember the content of your own videos. By labelling them the day that they were filmed you can speed things up by being like: “I remember that angle and I know it didn’t work (whereupon you delete the clip),” or “Fred said something hilarious in this one (instantly labels it Green) etc…
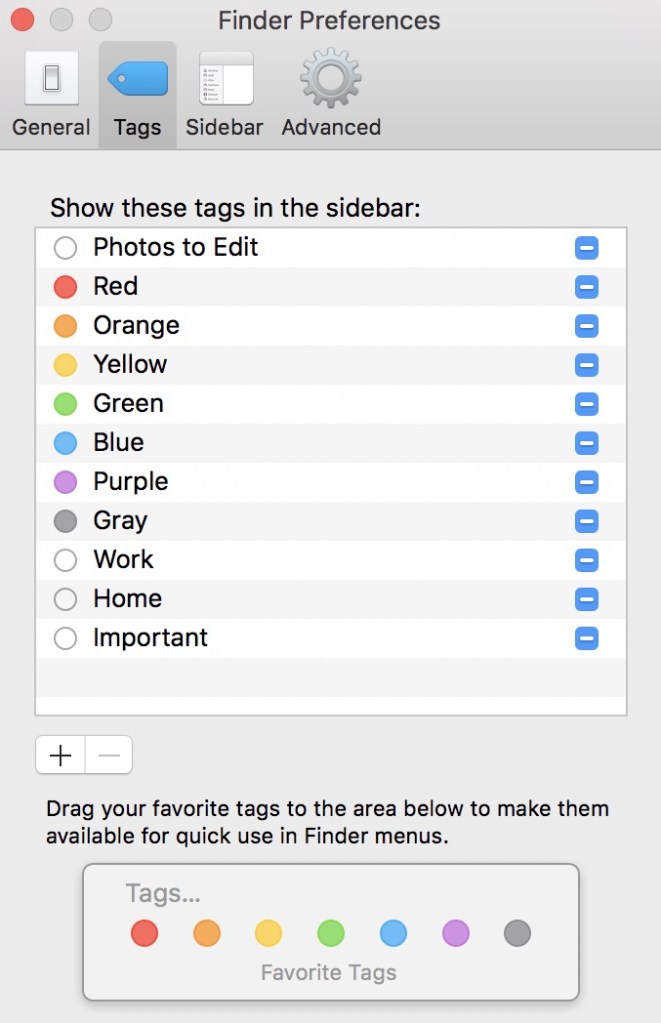
Next I will explain my labelling technique for raw video (assuming this is to make a short film/edit) – I use colour labels (available on Mac’s). All you have to do is click on the video and go to “File” then click whatever colour you wish to label it as. Here’s where it’s important to have a logical/repeatable system. I use 7 different colour labels: Purple, Red, Orange, Yellow, Green, Grey and Blue. This may seem like a lot but trust me – it’s easy to use and quite intuitive once you get the hang of it…
Purple: Video that is instantly amazing and should be in the final edit.
Red: Video that is almost perfect but would require fine tuning.
Orange: Video that shouldn’t be in the edit but is still good.
Yellow: Video that shouldn’t be in the edit but is worth keeping.
Green: Video that is funny, ie. for a gag reel etc.
Grey: Video for intros/outros, panoramas/setting the scene etc.
Blue: Video of other people (that is good).
During the analysis of the raw footage I keep the bin open next to the folder, this allows me to quickly drag clips that are useless straight into the bin without slowing me down (by having to hunt in the sidebar). Any clips that do not fit into the above 7 categories I bin immediately – it isn’t worth being sentimental about raw footage, especially considering that if there are 7 categories (and you might ignore Orange and Yellow if you’re hardcore) and it doesn’t fit into one of them – it must bad right? Once all of the videos have been labelled go to the Apple symbol on the top left corner of the screen and click “empty trash” in the drop-down. This is something that is worthwhile to get into the habit of because it will speed up your computer (if your storage is running out) and it keeps everything neat so that it’s ready for your next edit. Now all the clips may seem kind of all over the place. Have no fear. Just click on the settings/arrange drop-down menu on the folder and click “organise/arrange by,” then select “tags.” The computer will now display all of the videos you have kept in little bunches depending on what coloured tag you gave them, ready to be added to your editing software to make an actually rad edit.
