I’ve decided to alternate the themes of my blog posts between something kayaking related and something else that I’m interested in – this week I’m focusing on shoes because over the past month or so I’ve been painting a pair of white Air Force 1 Mids. I forget exactly how I got the idea except that one of my friends in school decided to paint all the stitching on his white Reebok Classics with black marker, he actually did a really good job and they ended up looking pretty cool; as a result we ended up scrolling through custom shoes on Instagram and I decided that given I needed a new pair of shoes anyway I’d buy some Air Force 1’s and paint them. This turned out to be a stroke of genius because shortly afterwards, quarantine was announced so I’ve had an extended project to occupy my time meaning that I haven’t gone nuts stuck inside yet.
The colours I chose weren’t that difficult to predict because my favourite colour is pink (specifically the neon variety) and I like the combination of pink and green. The photos in this post don’t fully represent the accurate colours (the pink looks a bit red) but I’ll take you through the whole process anyway, why I chose the paints I did and how I actually accomplished each step. It’s worth mentioning that I already had paint brushes because I played Warhammer for quite a while so I won’t go into that except to say that I used a fine brush for all of it because the work was actually surprisingly detailed in the end.
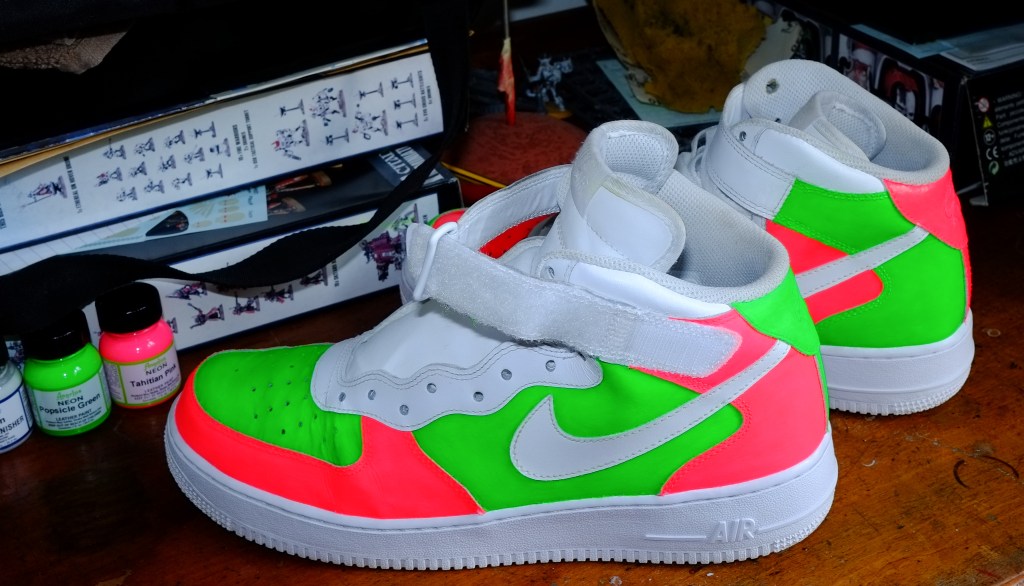
I chose a pair of Air Force 1 mids because I liked how they looked and lots of people seem to be wearing them. They are a popular shoe to customise because they’re easily available, come in all white and have largish blank panels that are easy to paint on, after finding a pair for £39 on Ebay that sealed the deal, I ordered them and they arrived within a day or two. I chose to use Angelus leather paints because after doing some research into which paints I should use on leather, Angelus paints seemed like the best option because they’re actively designed to go on shoes, lots of people have used them with good results and they weren’t too expensive (roughly £5 per colour). I found out there were neon options (so they glow under black lights – those blue lights you see at concerts or parties etc) and so I chose Popsicle Green combined with Tahitian Pink and a Satin Finisher (to protect the shoes with once I was finished) which seemed to be good choices…
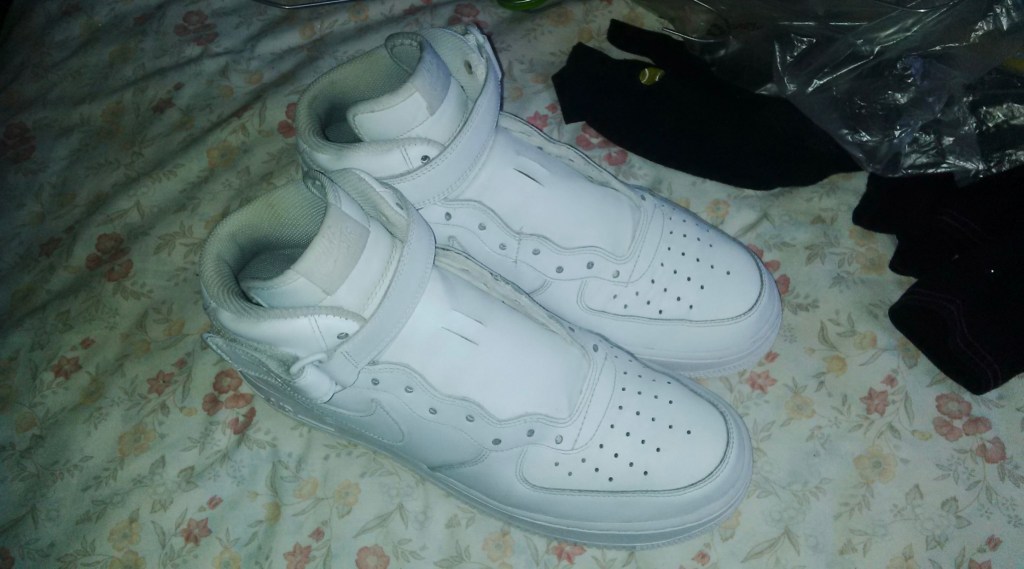
The first thing I did once the shoes arrived was to remove the laces so they didn’t get in the way and so that I couldn’t accidentally paint on them. After that I had to remove the protective coating that’s on most leather products, it protects the shoes from scratches and to some extent may help the leather keep your feet dry if the shoes get wet. To do this I first got laundry detergent and mixed it with warm water, then I took a bristle brush and scrubbed the shoes with the solution to make them as white as I possibly could (so that the paint showed up more easily). Next, I took some nail polish remover and used cotton pads to spread a thin layer of it all over the areas I intended to paint, left in on for a few minutes and washed it off. This removed the protective layer and allowed the Angelus paints to properly stick to the shoes as I was painting them. The picture above is what the shoes looked like after these first few steps.
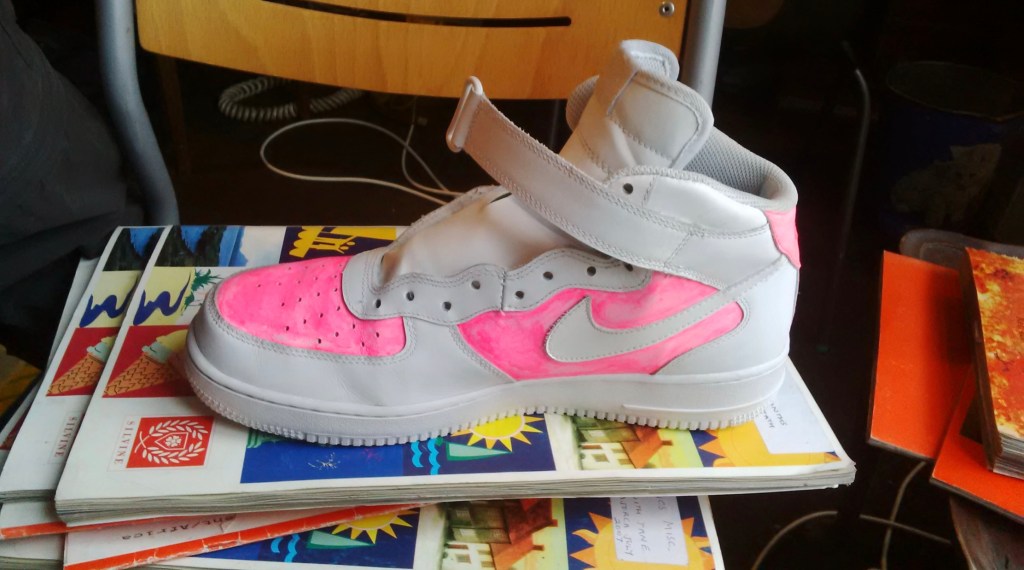
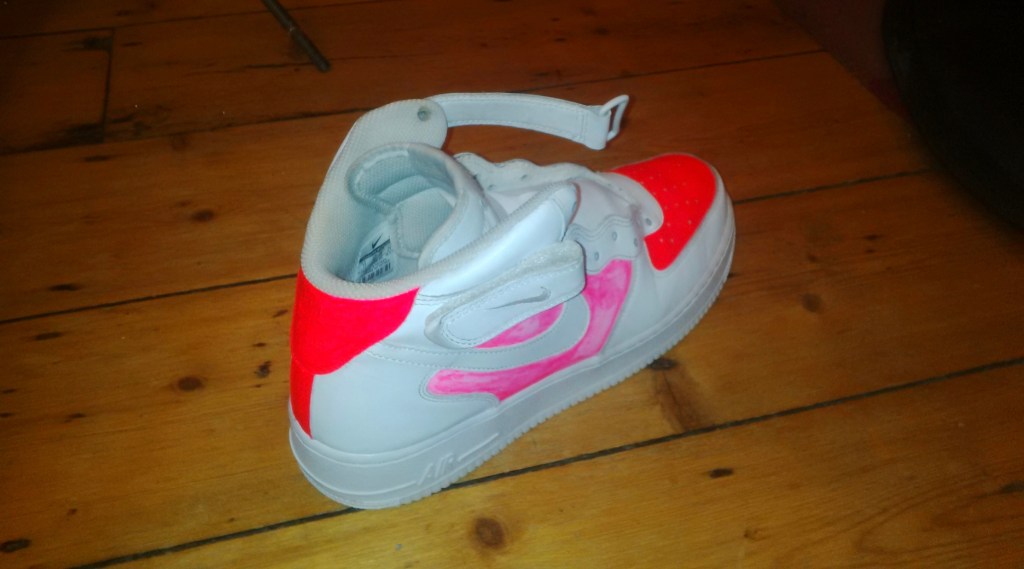
I started with the Tahitian Pink and painted a single layer across all of the panels I wanted in pink to see exactly what the paint would look like and how long it would to take to do each layer, as you can see from the image above the result was rather unsatisfactory and one of friends even said it looked like I’d taken a pink Sharpie and scribbled on the shoe; obviously being quite disappointed with how it looked I then spent a while adding multiple layers (of which it took about 7 or 8) until I was happy with the distribution of the paint across the panels. Below you can see how different the middle panel looks with a single layer of paint compared to the front and back panels which are fully layered…
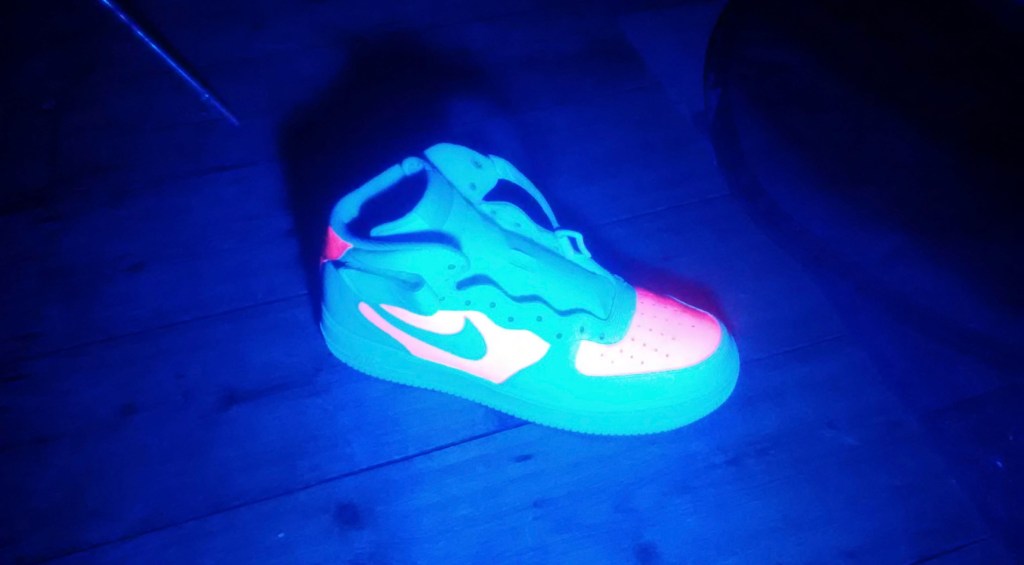
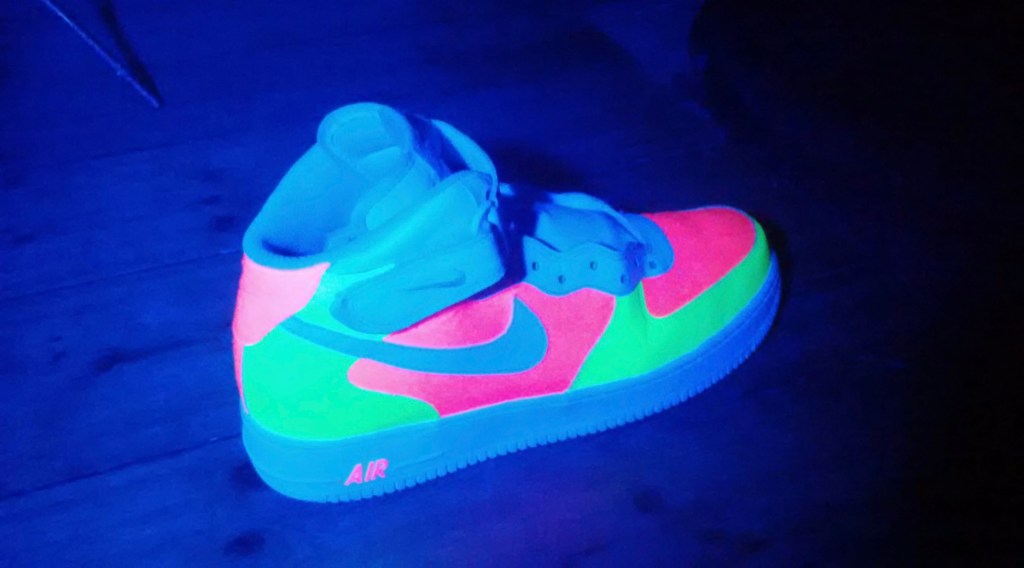
I happen to have a Philips lamp in my room which does the same thing as a black light. It has a slider so you can change the colour it glows but I noticed a while ago that when it was on the blue setting it made certain objects in my room glow (anything transparent or white) so I turned the lights off and shone the lamp on my shoe once the pink panels where finished and it looked sick. It also made it really obvious where I’d screwed up or accidentally got a tiny speck of paint on a white panel which meant that I spend rather a long time correcting my mistakes with warm water and a sponge.
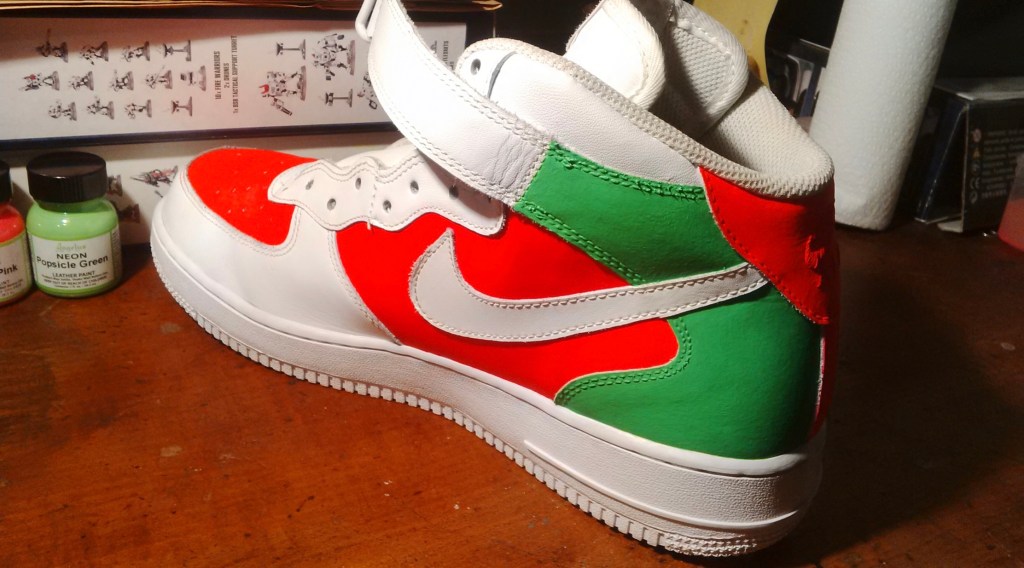
The Popsicle Green paint turned out to be a bit harder to use than the Tahitian Pink. The pink was quite a light shade so it blended easily with the white, but when I started on the green panels I realised that because the green was much darker than the pink it took a few more layers to get an even coating over the white base. This meant the green panels took significantly longer to finish (about an hour per panel).

When I initially started the green I wasn’t sure what to do with the grey section on the edge of each outstanding panel but in the end I decided to leave it grey, anyway I figured that when I’m wearing the shoes you wouldn’t actually be able to see edges unless you lay down and looked at them really closely. The stitching was actually the hardest part because it didn’t want to absorb the paint so I had to use really thick layers to go over it, consequently it was also harder to get an even finish over the whole panel if the areas around the stitching needed to be thicker…
The first shoe took me about 3 weeks on and off to complete (pictured below at the top of the photo). By this point quarantine/self-isolation had been announced and I started to have a lot more free time to get on with painting the second shoe, especially in the evenings; I’d also realised I could use a hair dryer to significantly speed up the painting process by drying the paint more quickly, so I expected to finish the second shoe much faster than the first. It’s actually very relaxing just sitting down, turning on your portable speaker and focussing for hours on painting something small and detailed, it’s like a form of meditation and I find it helps distract from any work (or the news).
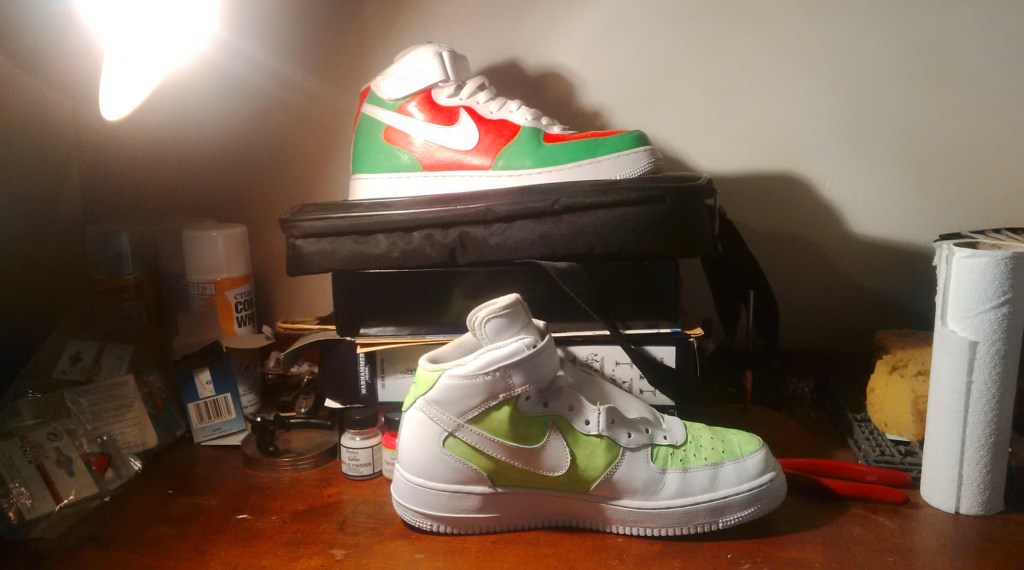
On the second shoe I wanted to switch the colours around, effectively any panel that was pink on the first shoe would be green on the second and vise vera. This is something a lot people do with sports shoes, you buy two pairs of the same shoe in two different colours and then you wear one of each, I like how this looks and decided to replicate it by just painting the colours differently between the two shoes, it also makes it more obvious that they’re custom because even Nike’s customising option won’t let you have different colours on different panels for same pair of shoes.
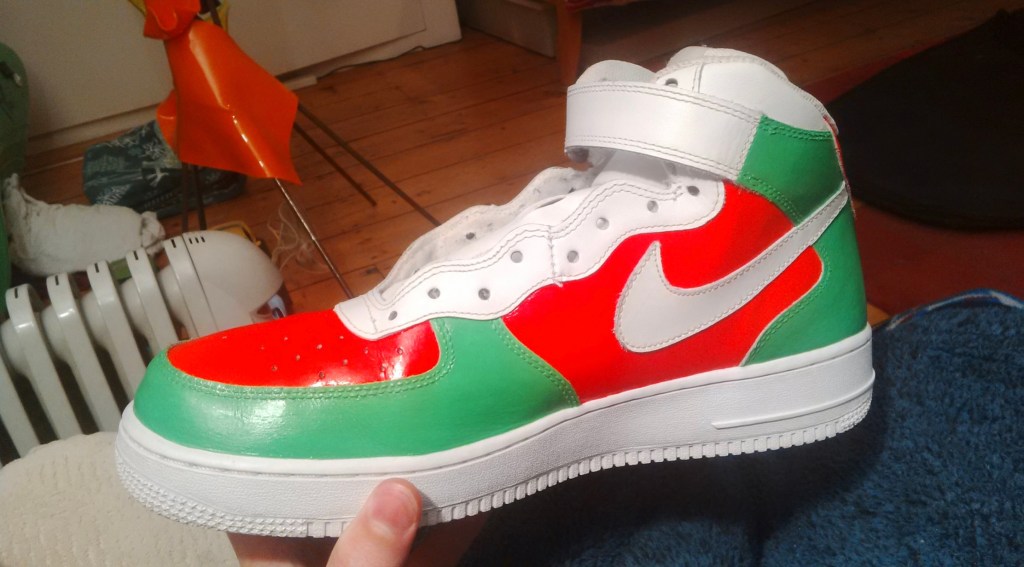
To finish the shoes off I only had to apply the finisher. This is a transparent protective coating that seals the paint in and serves the same purpose as the original coating I had to remove at the beginning. Angelus finishers come in multiple types depending on how shiny you’d like the shoe to be, I didn’t want it be matte (and I didn’t own an airbrush which I would have needed for that) and I didn’t like the super shiny options so I opted for Satin which is the middle option – glossy but not over the top. Initially I wasn’t sure I liked how the shoes looked once I’d applied it and I was worried I’d screwed them up, but after a night drying all the uneven patches had disappeared and the shoes looked much better. Any areas of paint which hadn’t been perfectly smooth or layered properly had been covered by the finisher and in bright sunlight the shoes shone like a toffee apple. They took far too long to finish and a lot effort on my part but they look seriously dope and I can’t wait to wear them around once quarantine is over…
Don’t forget to subscribe to my blog if you enjoyed this post and would like to be notified about any new publications…
